This sweet milk bread recipe is soft, fluffy, and slightly sweet. I will show you how to make bakery-style milk bread at home with simple steps.
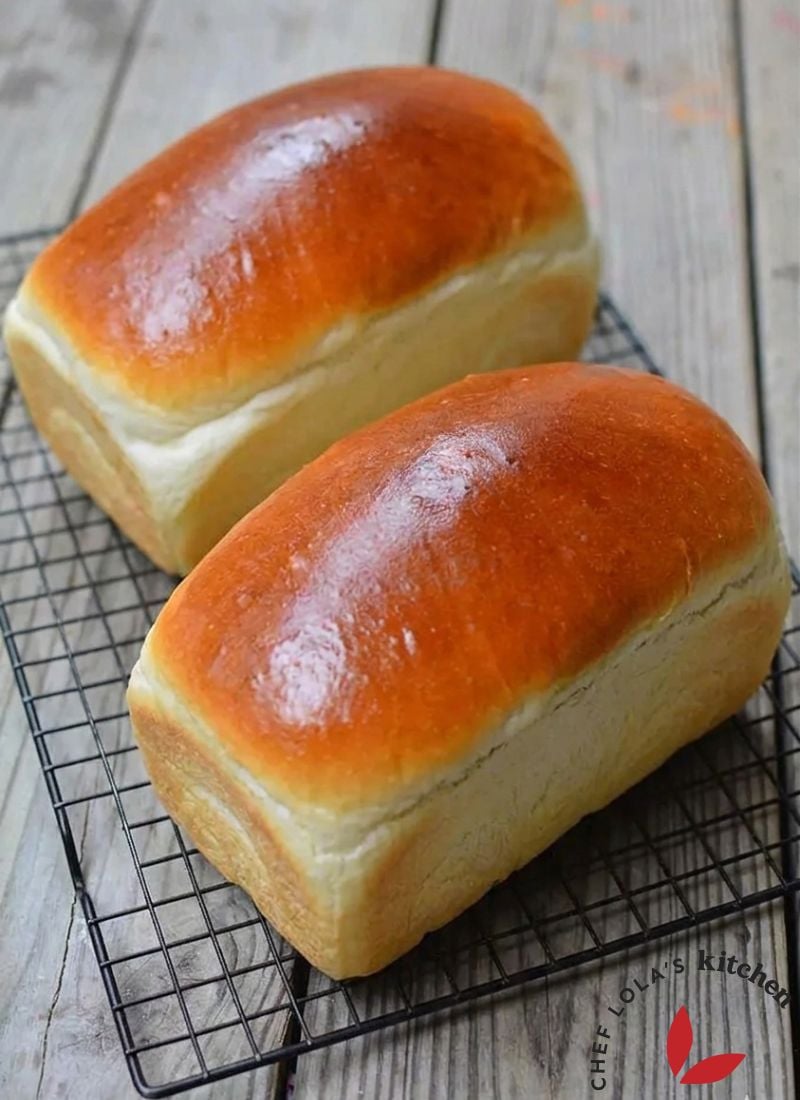
White Bread
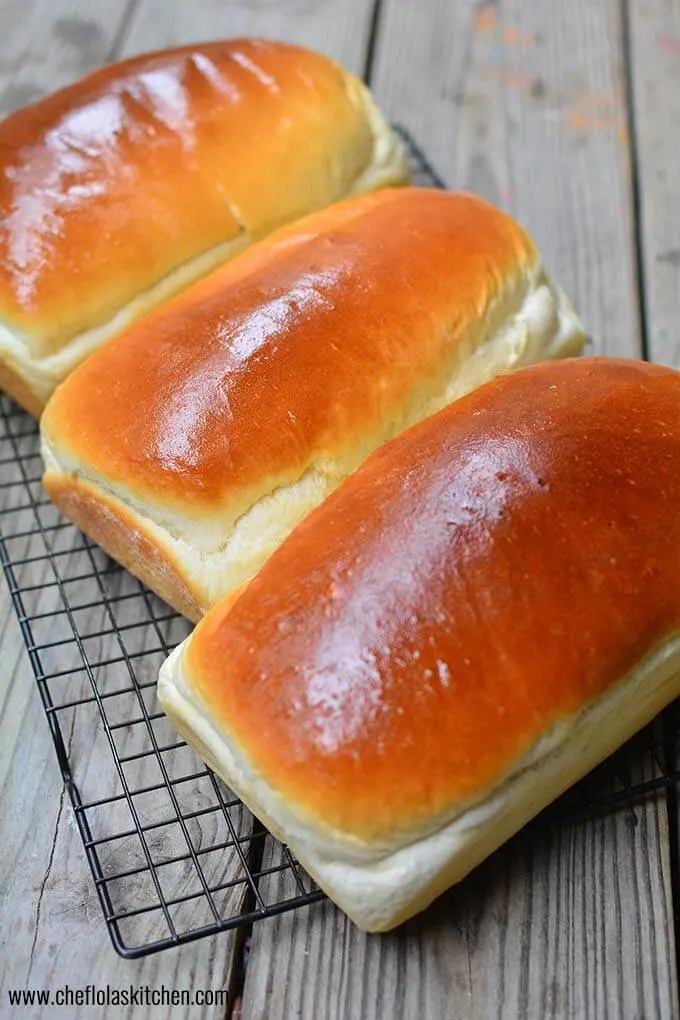
The first time I pulled sweet milk bread out of my oven, I could not stop touching it. It was so soft, warm, and fluffy that I knew I had to perfect this recipe.
This sweet milk bread is one of those recipes that rewards patience. It’s not rushed, but the result is absolutely worth it.
Once you get comfortable with it, it becomes second nature, and honestly, there’s nothing quite like homemade bread done right.
Why I Love Sweet Milk Bread
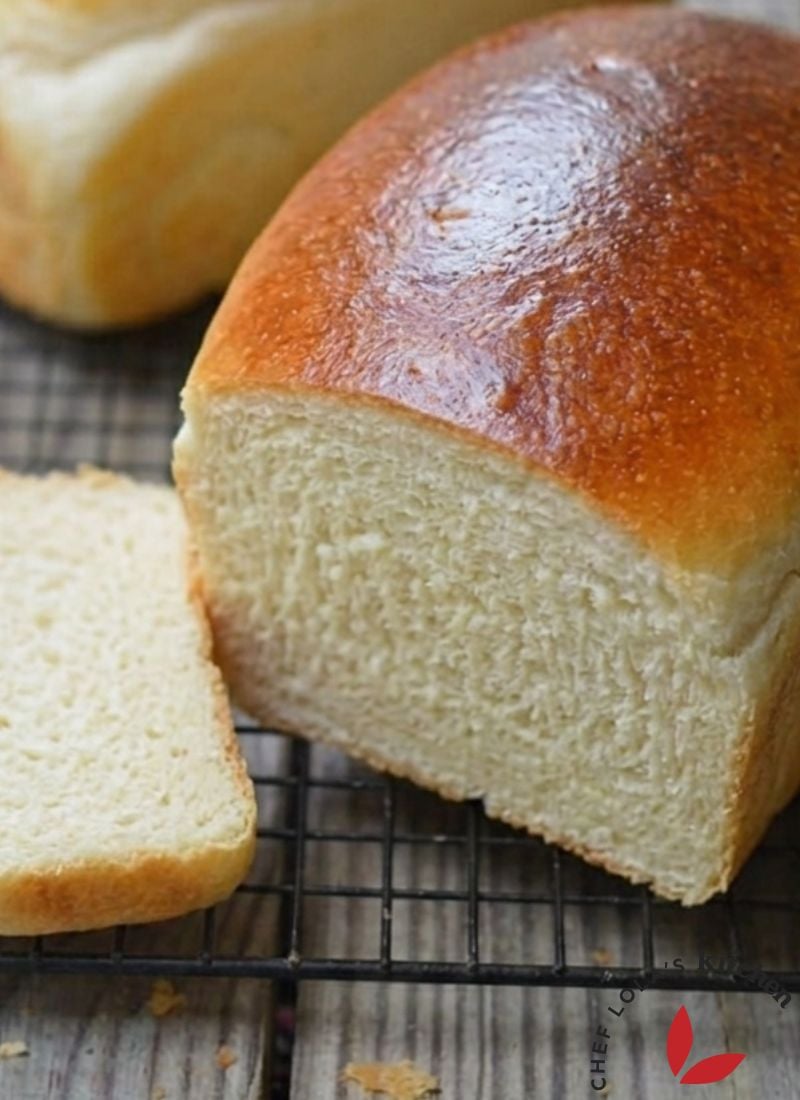
This sweet milk bread is everything I grew up loving: soft, slightly chewy, lightly sweet, and incredibly comforting. It’s the kind of bread you can enjoy on its own, with butter, or alongside a simple breakfast. It fills the whole kitchen and makes everything feel calm and cozy.
Growing up just a few blocks away from a bakery, fresh bread was always within reach. When I moved away, I tried so many store-bought options, but nothing really matched that soft, milky texture I remembered. That’s what led me here. Years of testing (yes, you read right, years!), adjusting, and finally landing on this recipe that gave me exactly what I was looking for!
This bread pulls apart easily and has a delicate crumb that almost melts in your mouth. This is the type of bread I grew up eating. Yes, we had a bakery less than 5 minutes walking distance from my house!
Why This Recipe Works
After baking this countless times, I can confidently say the success of this bread comes down to a few key things:
- Using the right flour for structure
- Proper kneading to develop gluten
- Allowing enough rise time
- Baking with the right moisture in the oven
When all of these come together, you get a loaf that is soft, airy, and beautifully tender.
What Is Sweet Milk Bread
Sweet milk bread is a soft, enriched bread made with milk, butter, sugar, and eggs. These ingredients give the bread a tender texture and subtle sweetness.
Unlike rustic bread, this dough is rich and smooth. The milk and butter make it softer, while the sugar adds just enough sweetness without turning it into dessert.
It is perfect for breakfast, snacks, or even sandwiches.

Ingredients For Making Sweet White Bread
Every ingredient plays an important role here:
- Bread flour gives structure and chew
- Milk adds richness and softness
- Eggs help with texture and color
- Butter brings flavor and tenderness
- Yeast creates that light, airy rise
While all-purpose flour can work, bread flour consistently yields better results due to its higher gluten content.
How to Make Sweet Milk Bread
1. Mix the dough
Combine all ingredients and mix until a soft dough forms.
2. Knead until smooth
Knead until the dough becomes soft, smooth, and elastic. This takes about 8 to 10 minutes by hand.
3. First rise
Place in a warm environment and allow it to rise until doubled in size.
4. Shape the dough
Shape into a loaf or rolls, depending on your preference.
5. Second rise
Let the dough rise again until puffy.
6. Bake
Bake until golden brown and fully cooked through.
7. Finish
Brush with butter immediately after baking for a soft crust.
Mixer Or No Mixer (Hand Mixing)
You can make this Sweet white Bread with or without a mixer. However, to achieve a perfect result, you need to use Bread Flour because it has a higher gluten content than all-purpose Flour.
Although I've used all-purpose flour a couple of times and it turned out well, I will favor bread flour over all-purpose flour because the difference in the outcome is clear.
How to make White Bread with the Stand Mixer
The first thing to check is your machine's capability. A large stand mixer will successfully handle about 7 to 8 cups of flour. However, if you have a smaller stand mixer, I advise dividing this recipe in half.
A mixer makes the process easier, but it’s also easier to over-knead. Therefore, I will advise you to start checking on the dough after about five minutes from when you started kneading.
To use the stand mixer, simply add all the ingredients to the mixing bowl and mix on low speed with the dough hook until a dough mass forms. Continue processing until the dough cleans the sides of the bowl.
If all your ingredients are correctly measured, you will have no need to add more liquid. However, if there's a need to add more flour, feel free to do so (a little at a time) until you achieve a soft, elastic but not sticky dough.
How to Make the Sweet Bread without a Stand Mixer
This bread loaf can also be made with no stand mixer. This takes a bit more effort, but gives you great control.
You will need a clean table with a comfortable height and, of course, some elbow strength! This hand-kneading method should take about 10 minutes.
Mix all the ingredients together in a large bowl until combined. Turn the dough onto a lightly floured work surface and knead until it is no longer sticky and has become soft, smooth, and elastic.
As I stated above for the machine method, if you measure all your ingredients correctly, you will have no need to add more liquid. However, with the hand-kneading method, you will need to add more flour. A little at a time, as needed, until you achieve a soft, elastic, but not sticky, dough.
Tips for Perfect Bread
Measure accurately
Bread making is precise. Small changes can affect the final texture.
Use warm, not hot, liquid
Too hot will kill the yeast. Aim for warm to the touch.
Let it rise properly
Do not rush the process. The rise time is what develops flavor and texture.
Create steam in the oven
Adding a small pan of water in the oven helps the bread rise properly before the crust sets.
Let it cool before slicing
Cutting too early can ruin the texture.
Storage Tips
- Let bread cool completely before storing
- Store at room temperature in an airtight container
- Avoid wrapping while hot to prevent moisture buildup


Please note that you need to induce steam into the Oven by pouring water in a pan and placing it on the bottom rack of the oven. This will ensure that the bread bakes well and rises to its full potential before the crust is formed. It also helps to achieve that soft crust.
This is not a quick bread method, but the wait time is well worth it; Let the dough rest well! This rest period will allow the gluten to develop well. Don't hasten or shorten the rest time, and you will be rewarded with a perfectly soft and chewy sweet loaf of bread.
Let's talk about Yeasts - Understanding Yeast
There are a whole lot of yeast types you can use for breadmaking. However, I will be discussing the two main types common to the home baker.
- Active dry yeast – can be proofed before use
- Instant yeast – Also known as fast-rising or rapid-rise yeast. It can be added directly to dry ingredients
Learn the differences and similarities between active dry yeast and instant yeast here.
If you are unsure, proofing your yeast is always a safe option. A good yeast will foam within 5 to 10 minutes.
The active dry yeast may or may not be proofed. I know this may be a bit surprising because a lot of people think that there is a need to proof the active dry yeast. I have used the active dry yeast several times without proofing it and with great results.
On the other hand, Rapid Yeast does not require any proofing. You can add this directly to your dry ingredients. It will work just fine.
I will always encourage those who are new to baking to proof their yeast in warm water between 110°F and 115°F with a bit of sugar, just to make sure the yeast is alive and well. A bad yeast will produce a bad bread.
For this recipe, I proofed my yeast just to help new bakers get it right. If you are not new to baking, you may skip that step.
Notes:
- Make sure you measure all the ingredients accurately.
- Bring all the Eggs and butter to room temperature before using them.
- Be sure that the water you use is warm, not hot or cold.
- I added Vitamin C Powder. You can replace this with Vinegar. This acts as a preservative and creates an acidic environment, which helps the yeast work better.
- When the dough is rising, it's very important to place it in a warm place. I usually place mine in the Oven with the oven light on.
- Depending on the oven you use, some require you to rotate the bread from back to front during baking for even browning.
- To test for doneness, simply insert a skewer into the middle of the bread
- Once the bread is done, butter the surface to give the bread a shiny, soft, and tender crust.
- To get the best texture from your bread, let it cool completely before slicing.
- Always let the Bread come to room temperature before wrapping and storing.
There are a couple of Bread recipes I usually make at home (Yep, we love Bread). Feel free to check them out if you like.
Other Bread Recipes you might want to try:
- Quick and Easy Hot Dog Buns Recipe
- How To Make Bread Rolls
- Sausage Bread Rolls
- No-knead Bread Rolls
- No-knead Garlic Bread-Garlic Knots
- Chicken Stuffed Braided Bread
- Crusty No-knead Dutch Oven Bread
- No-knead French Bread
- Raisin Bread Rolls
- Meat Buns
- Easy Honey Whole Wheat Bread
- Moist and Indulgent Pumpkin Bread
Sometimes we forget the tea, sauce, butter, or eggs, and end up eating the bread as is within a couple of hours. I hope you enjoy it as much as we do!
Sweet Milk Bread recipe
Ingredients
- 6 cups bread flour 6 to 6.5
- 1 cup sugar (separate 2 teaspoon for proofing the yeast)
- ½ teaspoon vitamin C Powder 1 tablespoon Vinegar or Apple Cider Vinegar
- 1 teaspoon salt
- 3 tablespoon butter
- 2 tablespoon yeast
- 1 cup water
- 1 cup milk
- 2 large eggs
Instructions
Without a Stand Mixer
- Dissolve the yeast and 2 teaspoon sugar in warm water. Allow the yeast to proof for about 5 minutes, or until it becomes frothy.
- In a large mixing bowl, add the flour, the remaining sugar, and salt. Mix well.
- Make a well in the center and add the yeast mixture, eggs, milk, melted butter, and vinegar (or vitamin C powder). Mix with your hands until a sticky dough forms.
- Transfer the dough to a floured work surface and begin kneading, dusting the table with a little bit of flour at a time to prevent sticking.
- After about 10 minutes of working the dough, it should become smooth and elastic. Transfer it back to the bowl.
- Lightly coat the dough with oil to prevent the surface from drying out. Cover with a damp cloth, and place in a warm spot to rise for about 1 hour, or until doubled in size.
- Punch down the dough to release excess air (don’t overwork it).
- Transfer back to the work surface, divide into 2 equal parts, and shape each into a loaf.
- Prepare two 9x5-inch loaf pans by greasing them with oil and dusting them with flour or simply spraying them with a non-stick cooking spray.
- Place the shaped dough inside the prepared loaf pans, cover and leave to rise for 30 minutes.
- Bake in a 350°F preheated oven for 30 to 35 minutes or till a toothpick inserted in the middle of the bread comes out clean.
- Leave to cool for a couple of minutes and enjoy!
Stand Mixer Instructions
- Dissolve the yeast and sugar in warm water and leave to proof for 5 minutes or until frothy.
- Add all the ingredients (except the butter) inside the bowl of the mixer. Set the mixer to medium speed and begin to mix.
- After about 4 to 5 minutes of mixing the dough, stop the mixer and add the butter. Continue mixing for another 2 to 3 minutes until the dough becomes elastic and pulls away from the sides of the Bowl.
- (Proceed with the remaining steps from 6 above)
Notes
Nutrition
Let’s Connect.
You can find me on Facebook and Instagram. I love keeping in touch with all of you!
If you make this Sweet Milk Bread, I’d love to see pictures of your creations on Instagram or Facebook. #cheflolaskitchen


Kelsey
Wednesday 5th of March 2025
Great recipe. This reminds me of Portuguese sweet bread! Your recipe is delicious! Thank you for sharing 👏🏻
Chef Lola Osinkolu
Monday 24th of March 2025
Thank you, Kelsey❤️
Julaine
Monday 11th of November 2024
Mine didn't look like yours (at all) but it's VERY tasty.I wish I could attach a picture. The tops weren't smooth and browned like yours, they split and were more "rustic" looking. I even put in the pan of water to create steam. I'm baffled, but am still quite pleased with the flavor.
Chef Lola's Kitchen
Sunday 17th of November 2024
The crack might be from the mixing process. Keep making it. It'll get better.
Jessica
Friday 8th of December 2023
im soo confused on the sugar part. in the ingredients list you only have 1 cup of sugar but you put in the first step in the directions to dissolve sugar in warm water and then in the second step of the directions you have to add the sugar in the flour. can you please elaborate on this. what are the measurements for the sugar in both steps. thank you
Ozioma Nmeka
Saturday 18th of November 2023
You are too much, I will love to get more receipts from bread cake and other. Keep it up
Diane N
Thursday 27th of April 2023
Is it possible to make this recipe in a bread machine? Any feed back?
Chef Lola's Kitchen
Thursday 27th of April 2023
Diane, I haven't made it in a bread machine before. Nevertheless, I believe it should come out well.